# 3.2 授权码模式(authorization_code)
以Spring Security为例,为了达到快速演示效果,授权服务器和资源服务器都在同一个工程中
完整代码示例请参考knife4j-spring-oauth2-authorization_code (opens new window)
授权码模式需要服务端配置Knife4j的回调地址webjars/oauth/oauth2.html
部分示例代码:
@Override
public void configure(ClientDetailsServiceConfigurer clients) throws Exception {
    //授权码模式(authorization code)
    clients.inMemory()
        .withClient("app1").secret(noOpPasswordEncoder.encode("123"))
            .authorizedGrantTypes("authorization_code")
            .redirectUris(
                    "http://localhost:18010/webjars/oauth/oauth2.html")
            .scopes("read","write","reads","writes");
}
创建Docket对象时,设置OAuth2的授权类型,示例代码如下:
查看详细代码
@Configuration
@EnableSwagger2WebMvc
public class SwaggerConfig {

    @Bean
    public Docket productApi() {
        //schema
        List<GrantType> grantTypes=new ArrayList<>();
        //授权码模式AuthorizationCodeGrant
        TokenRequestEndpoint tokenRequestEndpoint=new TokenRequestEndpoint("http://localhost:18010/oauth/authorize","app1","123");
        TokenEndpoint tokenEndpoint=new TokenEndpoint("http://localhost:18010/oauth/token","access_token");
        AuthorizationCodeGrant authorizationCodeGrant=new AuthorizationCodeGrant(tokenRequestEndpoint,tokenEndpoint);
        grantTypes.add(authorizationCodeGrant);
        OAuth oAuth=new OAuthBuilder().name("oauth2")
                .grantTypes(grantTypes).build();
        //context
        //scope方位
        List<AuthorizationScope> scopes=new ArrayList<>();
        scopes.add(new AuthorizationScope("read","read  resources"));
        scopes.add(new AuthorizationScope("write","write resources"));
        scopes.add(new AuthorizationScope("reads","read all resources"));
        scopes.add(new AuthorizationScope("writes","write all resources"));

        SecurityReference securityReference=new SecurityReference("oauth2",scopes.toArray(new AuthorizationScope[]{}));
        SecurityContext securityContext=new SecurityContext(Lists.newArrayList(securityReference),PathSelectors.ant("/api/**"));
        //schemas
        List<SecurityScheme> securitySchemes=Lists.newArrayList(oAuth);
        //securyContext
        List<SecurityContext> securityContexts=Lists.newArrayList(securityContext);
        return new Docket(DocumentationType.SWAGGER_2)
                .select()
                .apis(RequestHandlerSelectors.basePackage("com.xiaominfo.knife4j.oauth2.web"))
                .paths(PathSelectors.any())
                .build()
                .securityContexts(securityContexts)
                .securitySchemes(securitySchemes)
                .apiInfo(apiInfo());


    }


    private ApiInfo apiInfo() {
        return new ApiInfoBuilder().title("knife4j-oauth2-demo").description("")
                .termsOfServiceUrl("https://doc.xiaominfo.com")
                .contact(new Contact("Developers", "https://gitee.com/xiaoym/knife4j", ""))
                .license("Open Source")
                .licenseUrl("\"https://www.apache.org/licenses/LICENSE-2.0")
                .version("1.0.0")
                .build();

    }


}
最终呈现界面如下:
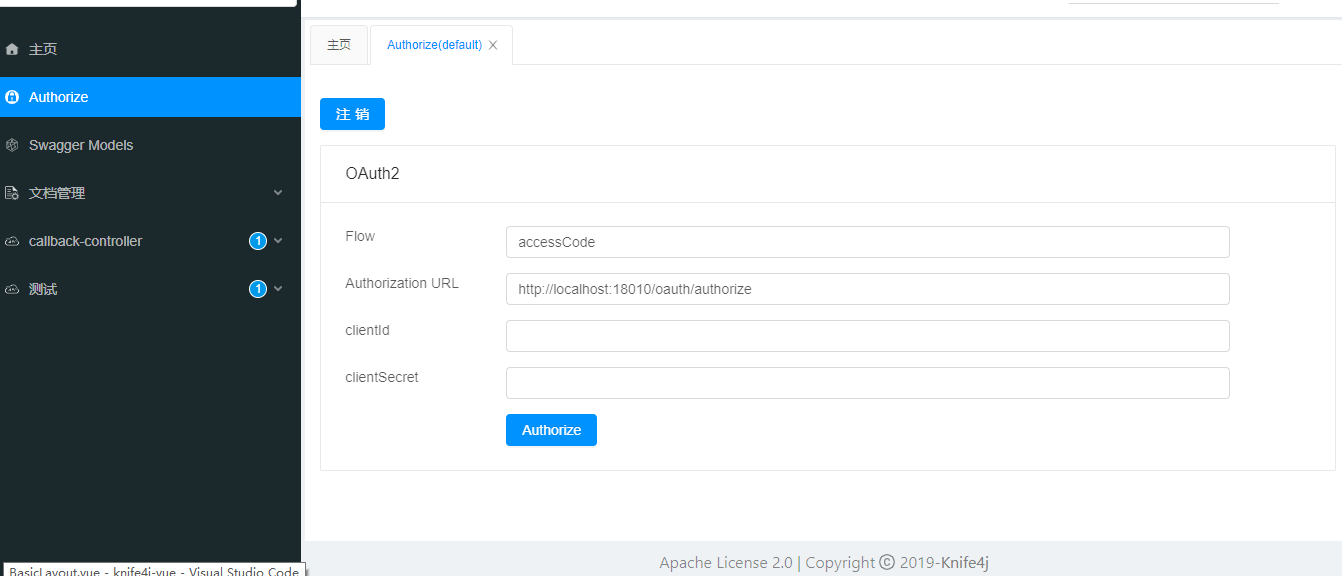
输入我们在配置文件中定义的clientId及clientSecret,然后点击Authorize按钮,最终跳转授权界面,如下图:
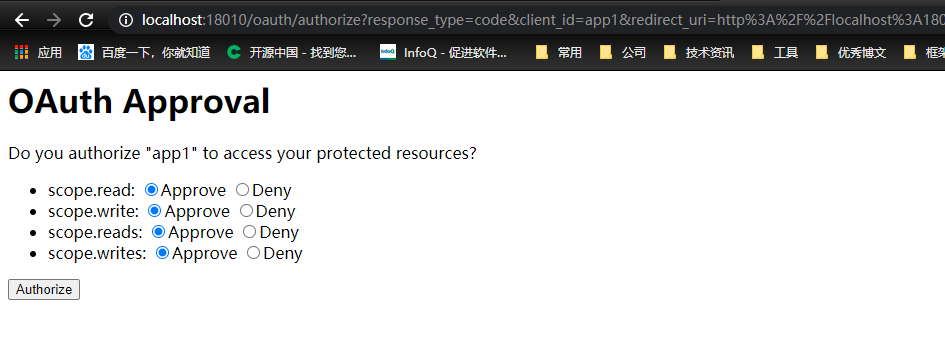
此时,选择进行授权即可
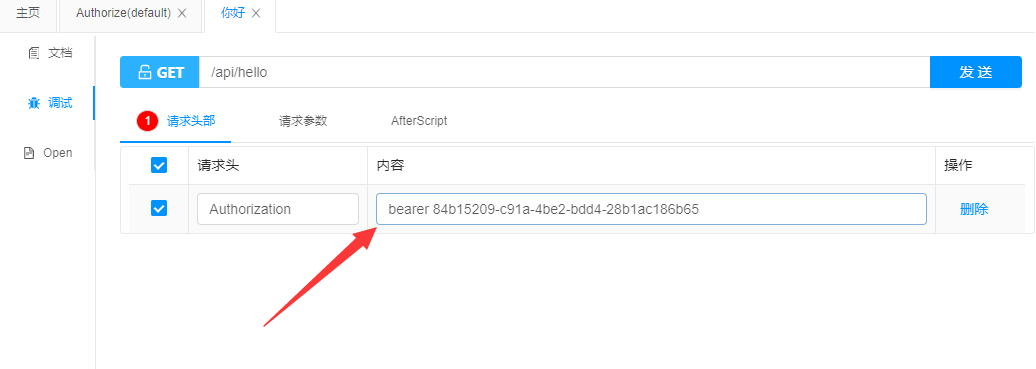
授权完成后,测试我们再我们的接口中,就会看到我们的参数Authorization值已经更新了,如下图:
有任何问题请使用
Knife4j的标签在OSC社区